共计 2093 个字符,预计需要花费 6 分钟才能阅读完成。
基础环境参考上一篇文章安装基本的驱动
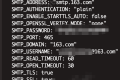
这个使用的曲线较高,有一定的学习成本。脚本如下直接使用即可!
#!/bin/bash
set -e

# ========== 配置 ==========
COMFY_DIR="$HOME/ComfyUI"
PYTHON_BIN="python3.10"
PORT="8188"
SERVICE_NAME="comfyui"
# ==========================

echo "[1/6] 安装依赖..."
sudo apt update
sudo apt install -y $PYTHON_BIN-venv $PYTHON_BIN-dev build-essential git wget
sudo apt install -y libgl1 libglib2.0-0

# 检查是否已有 ComfyUI 目录
if [ ! -d "$COMFY_DIR" ]; then
    echo "[2/6] 克隆 ComfyUI..."
    git clone https://github.com/comfyanonymous/ComfyUI.git "$COMFY_DIR"
else
    echo "[2/6] 已存在 ComfyUI,执行更新..."
    cd "$COMFY_DIR"
    git pull
fi

cd "$COMFY_DIR"

echo "[3/6] 创建 Python 虚拟环境..."
if [ ! -d "venv" ]; then
    $PYTHON_BIN -m venv venv
fi
source venv/bin/activate

echo "[4/6] 安装基础依赖..."
pip install --upgrade pip wheel setuptools
pip install -r requirements.txt

# 检测 NVIDIA GPU
if command -v nvidia-smi &> /dev/null; then
    echo "[5/6] 检测到 NVIDIA GPU,安装 GPU 版 PyTorch..."
    CUDA_VER=$(nvidia-smi | grep -oP 'CUDA Version: \K[0-9]+\.[0-9]+')
    echo "CUDA 版本: $CUDA_VER"

    pip uninstall -y torch torchvision torchaudio || true

    if [[ "$CUDA_VER" == 12.* ]]; then
        echo "使用 cu121 版 PyTorch (兼容 CUDA 12.2)..."
        pip install torch==2.3.1 torchvision==0.18.1 torchaudio==2.3.1 --index-url https://download.pytorch.org/whl/cu121
    else
        echo "使用 cu118 版 PyTorch..."
        pip install torch==2.3.1 torchvision==0.18.1 torchaudio==2.3.1 --index-url https://download.pytorch.org/whl/cu118
    fi
else
    echo "[5/6] 未检测到 NVIDIA GPU,安装 CPU 版 PyTorch..."
    pip uninstall -y torch torchvision torchaudio || true
    pip install torch==2.3.1 torchvision==0.18.1 torchaudio==2.3.1
fi

echo "[6/6] 创建 systemd 服务..."

SERVICE_FILE="/etc/systemd/system/$SERVICE_NAME.service"
sudo tee $SERVICE_FILE > /dev/null <<EOF
[Unit]
Description=ComfyUI Service
After=network.target

[Service]
Type=simple
User=$USER
WorkingDirectory=$COMFY_DIR
ExecStart=$COMFY_DIR/venv/bin/python $COMFY_DIR/main.py --listen 0.0.0.0 --port $PORT
Restart=always

[Install]
WantedBy=multi-user.target
EOF

echo "[✅] 安装完成,启动 ComfyUI 服务..."
sudo systemctl daemon-reload
sudo systemctl enable $SERVICE_NAME
sudo systemctl start $SERVICE_NAME

echo "✅ ComfyUI 已作为 systemd 服务启动"
echo "👉 访问: http://$(hostname -I | awk'{print $1}'):$PORT"
echo "👉 管理命令:"
echo "sudo systemctl start $SERVICE_NAME"
echo "sudo systemctl stop $SERVICE_NAME"
echo "sudo systemctl restart $SERVICE_NAME"
echo "sudo systemctl status $SERVICE_NAME"
微信扫描下方的二维码阅读本文

正文完